Paper Bag Flowers-Cut 6 to 8 circles from a brown paper bag. These can be all the same size or varying from small to big.Scrunch & ink each circle over the surface & along the edges. Layer together & insert a brad through the center.Pull up the edges of the circles to create a full flower to your liking. A light spray of Glimmermist adds a nice shimmer to it.The brad can be the flower center or you can add something else to the center of the flower.eg. buttons, staemens, bling. Tissue, crepe & patterned paper can also be used.
Calico Flowers-Cut strips of material to the width & length you desire the finished flower to be.eg. 1" x 8". Fray one long edge of the material.Thread a needle & knot the end & sew a running stitch along the other edge. Pull up the thread to gather the material. Do not cut off the thread. The strip will fold along itself. Overlap the edges & sew into place. The material can be left plain or sprayed with glimmermists to colour it. Patterned & sheer materials can also be used. For different edges, pinking shears will give a zigzag effect or you can fold the strip in half for a smooth edge.
Circle Flowers-Cut out or punch circles of varying sizes. Fancy edge scissors or punches will give the flowers a softer look.There are different ways to decorate the flowers. 1}Go around the edges of the circles with puff paint or glitter glue then leave to dry before assembling. Spray with glimmermist and/or dimensional magic to give them a shimmering sheen. Use ink & stamps to alter the paper. Paint with Twinkling H2Os or other shimmering paint. Tape the layers together to hold in place. Add a decorative center.
OTHER FLOWERS-look on websites to find patterns for crotched flowers, quilled flowers, teabag folding/origami,ribbon/material flowers or use unusual shapes & objects to use as flowers.
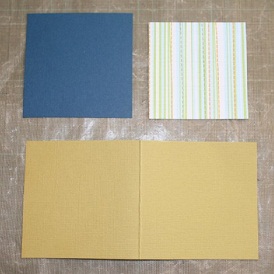
GIFT CARD BOXThis gift card box makes a great gift for someone or you can just keep it for yourself and have a supply of gift cards on hand. They can be themed or blank general cards. I mix & match the colours & papers & embellishments so each design is different but still look good together. 2 sheets plain cardstock makes 8 cards at 20x10cm each. Another piece of plain cardstock is used for the matting & I use 2 sheets patterned paper for the top layer. Embellishments & stamping decorate each card.
Start off by painting a small square box-this one is a 12cm square paper mache box. Two layers of paint give good coverage. You can ink or spray ink the box if perferred. The top of the box is decorated with paper & embellishments. A ribbon can be adhered around the rim of the lid &/or the box.
The cards are made in a production line manner. Cut all the cards, then the mats then the top layer.
Double sided tape works well & I tape all the pieces first.
All the embellishments are assembled & any stamping is done. Then I tape the mat pieces on followed by embellishments. Sentiments can be stamped inside the cards if you wish.
Any themes can be made or even a box of different occasion cards can be assembled.
These take a little time to make but they are lots of fun to do. You could also make up a mixed box by using up some of the scrap paper stash.