Hi and here are my first designs for the Memory Maze design team....
'PERFECT"

I wanted to highlight my Mum & Dad's wedding photo so kept the layout colours to gold and white and used texture to add interest to the layout.

The small square frame was covered with embossed paper and painted gold. The larger frame was painted white and pearls strips were adhered around the edge to give it a 3D effect.
"Perfect" was painted white then Plaid- Folk Art Extreme Glitter in gold was painted over the top.
The wrought iron heart was painted gold with the gold glitter painted over the top of it.
The vintage corners were painted in vintage gold acrylic paint.
The embossed paper was adhere behind the white frame.
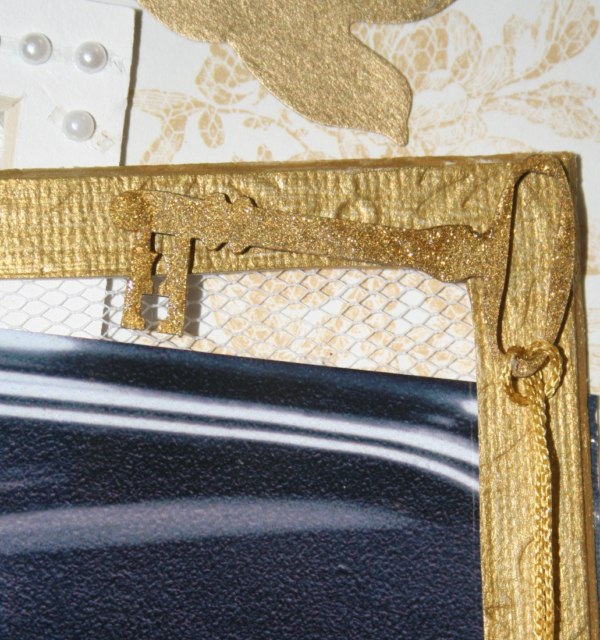
The key was undercoated in gold paint then gold glitter was painted over it. The tassel was attached to the key before it was adhered to the smaller frame. The photo and the tulle were adhered behind the frame before putting it on the layout.
MEMORY MAZE PRODUCTS
Vintage Corners CO139
Old Key COO30
Wrought Iron Heart 25
Perfect GO196
Square Frames-mattboard Square set of 9 50-290
Embossed Paper-cream embossed rose HMP007
OTHER PRODUCTS
white bazzill bling, papermania-confetti, skeleton leaves, tassell, tulle, flowers, letter & verse stickers,die cut bird, gold & white acrylic paint, plaid folk art extreme glitter in gold.
.......................................................
"2012"

Even though these photos were taken at the beach I wanted the layout to be about the motorbike and the "boys being boys". So I added all the grungy raised pieces to give this effect.
To make this layout I first laid the photos where they were to go and marked around them with a pencil as I needed an outline to know where to stop putting the different mediums and embellishments. I put a strip of mesh tape in the corners and sponge on the pewter distress stain then lifted the tape and moved it to overlap the stain and the black background. I laid a mask of cogs next to the tape (top & bottom) and spread texture paste over this and down to where the photos were to go.
The chipboard pieces were decorated first and all the embellishments were laid out ready to go. I pushed and placed these into the texture paste and left it all to dry. Check to make sure the photos still fit in before it dries so you can move things if you have to but don't stick the photos down yet!
Once dry, I painted over everything with black gesso, leaving the silvery areas untouched and used my finger to smudge some gesso over the edges so it blended in without leaving a distinct border.

Areas of the layout were highlighted with the distress stain to give depth to the items and not make them look flat and all one colour. When the gesso was still wet I wiped across some of the metal pieces to show the details of the embellishments.

The motorbike was first sprayed all over with memory mist then black gesso was smeared on to give a shadowing effect. Brushed pewter stain was applied to hightlight the "chrome" areas of the spokes, guards and handlbars as well as on the rider to give light and shade to the figure. Distress Stickles (like glitter glue but without a lot of glitter) was used on the tyres to give them "tread" texture.

Distress Stain in Brushed Pewter was applied all over the 2012 then black gesso was smudged on using my fingertip pressed onto it. Distress Stickes in Pewter was dabbed around the edges of the number.
MEMORY MAZE PRODUCTS
Heel Click (motorbike) SO516
2012 CO122
OTHER PRODUCTS
black cardstock, Tim Holtz Distress Stain & Stickles - brushed pewter, texture paste, black gesso, mesh tape, assorted metal and plastic embellishments.
...................................................
"BLESSINGS"

With Easter on its way I thought this would make a nice "candy sweet" card.
The rose ribbon corners from the 3D Stackums were fussy cut and layered under the stamped tag. Gems were stuck on the corners to finish the tag. The front edge of the card was punched with a Martha Stewart border punch. The edges of the tag and the embossed paper were smudged with pink ink.

The bottom layer is handmade patterned tissue paper. The top layer of cream embossed paper has been lightly brushed over with pink ink. The bows were cut out from the 3Dstackums and layered together with the chick on top.
The chick and all the eggs were painted with pink, silver and gold glitter paint.
MEMORY MAZE PRODUCTS
Chick & Eggs CODE
Eggs CODE
Cream Embossed Rose paper HMP007
handmade pink tissue paper
3D Stackums- CODE
OTHER PRODUCTS
ric rac ribbon, gems, stamp & ink, white bazzill bling cardstock
...........................................
I hope you have enjoyed seeing these layouts and card and have found some new ways to use your chipboard pieces.


+%5B800x600%5D.jpg)

