WELCOME

Thanks for taking the time to have a read of my Heart & Soul blog. You are welcome to leave a comment & any tips about scrapbooking or anything at all really!
LIVE WELL, LAUGH OFTEN, LOVE MUCH.
Happy Scrapping from Susan.
Showing posts with label cards. Show all posts

Tuesday, December 24, 2013

Merry Christmas


Wow only 1 sleep to go!!!!! How excited is everyone? My Christmas celebrations will be lasting over a week as we catch up with family and friends..I can't wait.
Memory Maze Designs keep coming up with such great designs and I love all their Christmas ones. I've been catching up on some old photos before the ones for this year are taken.
NAUGHTY OR NICE?
Both of the titles on this layout suit my husband and our sons!
Both of these titles go together quite well and the Santa stuck in the chimney was perfect to fit above our own fireplace in the photo! The frame was wrapped in Washi Tape.

This title comes already coloured in the green and applied glitter glue straight over the top. The tree was coloured in with marker pens then gems were adhered on it.

The Santa piece was coloured in with marker pens then coated with crystal glaze. The "snow" is Stickles in Picket Fence.
 

This title was painted with Smooch in Siren, Green and Solar Gold.

The swirl was misted in gold then embossed in patches with gold embossing powder. Clear Utee was embossed over the whole piece to make it nice and shiny.
All these pieces were quick and easy to do and very effective.
MEMORY MAZE PRODUCTS USED
Santa let me explain KW006
Naughty or nice CO093
Tree CO096
Santa in Chimney
Frame
Swirl LO057
 
Other Products used
Kaisercraft Christmas Carol collection-Away In A Manager, Graphic 45 Christmas Past- Letter to Santa
......................................................................................................................................
CHRISTMAS

I love the snowflake frame with the inner frame as part of the set. As Christmas in Australia is hot I decided to make the colours I chose warm and not the cool ones normally associated with snow.
The frame was misted with Perfect Pearls Mist in Heirloom Gold then sprayed in patches over the snowflakes with Radiant Rain Mist in Persimmon and Solar gold. Small pearls were stuck in the middle of the snowflakes.

Since the frame is quite elaborate I kept the embellishments simple to balance it all out. I sprayed white flowers with the same mists so they would match in perfectly.
MEMORY MAZE PRODUCTS USED
Christmas Frame
Other products used
Flourish With A Bling-Chloe-Antique Gold, Green Tara
.........................................................................................................................
MERRY CHRISTMAS
 
 
The frame was coated with Adiriondack dabber in pearl and the window in Distress Stain in black soot with Distress Stickles in gunmetal. The top part of the frame was covered in Petal Soft in polar white to make it look like snow had settled there. The snowflakes were base coated in Distress Stain in Brushed Pewter and Stickles in frosted lace were applied over the top. The Merry Christmas is already coloured so I  applied Distress Stickles in clear rock candy over the top.
 
 
Wishing everyone a very safe and Merry Christmas and best wishes for 2014.

Tuesday, July 23, 2013

Cards For You

I haven't made cards in awhile and with a couple of rainy days I made the time to have a play! I am also making some kits using Kaisercraft Summer Breeze range...It is an idea out of their magazine...soon to be completed and I'll post the photos of them.
These cards were made from my left over bits stash! I keep the papers filed by their colours in plastic envelope folders so it is easy to find what I want. I also find papers that go together quite easily.

The smaller pieces of card and paper I keep to fussy cut and to make tags and journalling blocks.

Odd flowers and left over cut pieces of bling and swirls go together nicely. Big tags can be cut to size to fit on smaller projects. Some stamping personalises your projects and adds that special touch.


Thursday, May 2, 2013

May Days

With Mothers Day a week and half away, now's a good time to dabble in a bit of card making. Why not even make a few extra cards to send to the people in your life and love and care for you. A note to let each other people know how appreciated they are is always a nice surprise!

This is my sister and myself. Her birthday is on Mothers Day this year and since our Mum is our guardian angel now we will be celebrating this day together and remembering our Mum. I know that if we were in trouble for something we only had to make our Mum laugh and she couldn't stay mad for long! Sometimes when my sister laughs I can hear Mum's laugh in her and it brings back wonderful memories.

Tuesday, February 26, 2013

Memory Maze Designs

Hi and here are my first designs for the Memory Maze design team....   
'PERFECT"
I wanted to highlight my Mum & Dad's wedding photo so kept the layout colours to gold and white and used texture to add interest to the layout.

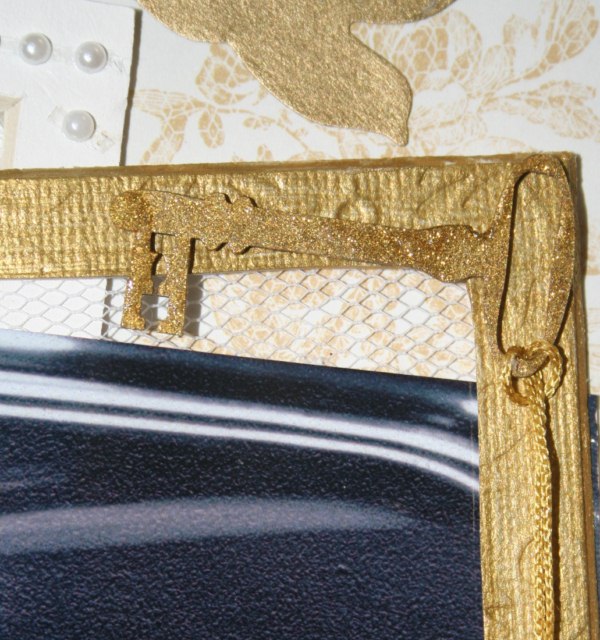
The small square frame was covered with embossed paper and painted gold. The larger frame was painted white and pearls strips were adhered around the edge to give it a 3D effect.
"Perfect" was painted white then Plaid-  Folk Art Extreme Glitter in gold was painted over the top.
The wrought iron heart was painted gold with the gold glitter painted over the top of it.
The vintage corners were painted in vintage gold acrylic paint.
The embossed paper was adhere behind the white frame.

The key was undercoated in gold paint then gold glitter was painted over it. The tassel was attached to the key before it was adhered to the smaller frame. The photo and the tulle were adhered behind the frame before putting it on the layout.
 
MEMORY MAZE PRODUCTS
Vintage Corners   CO139
Old Key   COO30
Wrought Iron Heart   25
Perfect   GO196
Square Frames-mattboard Square set of 9   50-290
Embossed Paper-cream embossed rose   HMP007
 
OTHER PRODUCTS
white bazzill bling, papermania-confetti, skeleton leaves, tassell, tulle, flowers, letter & verse stickers,die cut bird, gold & white acrylic paint, plaid folk art extreme glitter in gold.
.......................................................
"2012"
Even though these photos were taken at the beach I wanted the layout to be about the motorbike and the "boys being boys". So I added all the grungy raised pieces to give this effect.
To make this layout I first laid the photos where they were to go and marked around them with a pencil as I needed an outline to know where to stop putting the different mediums and embellishments. I put a strip of mesh tape in the corners and sponge on the pewter distress stain then lifted the tape and moved it to overlap the stain and the black background. I laid a mask of cogs next to the tape (top & bottom) and spread texture paste over this and down to where the photos were to go.
The chipboard pieces were decorated first and all the embellishments were laid out ready to go. I pushed and placed these into the texture paste and left it all to dry. Check to make sure the photos still fit in before it dries so you can move things if you have to but don't stick the photos down yet!
Once dry, I painted over everything with black gesso, leaving the silvery areas untouched and used my finger to smudge some gesso over the edges so it blended in without leaving a distinct border.

Areas of the layout were highlighted with the distress stain to give depth to the items and not make them look flat and all one colour. When the gesso was still wet I wiped across some of the metal pieces to show the details of the embellishments.

The motorbike was first sprayed all over with memory mist then black gesso was smeared on to give a shadowing effect. Brushed pewter stain was applied to hightlight the "chrome" areas of the spokes, guards and handlbars as well as on the rider to give light and shade to the figure. Distress Stickles (like glitter glue but without a lot of glitter) was used on the tyres to give them "tread" texture.

Distress Stain in Brushed Pewter was applied all over the 2012 then black gesso was smudged on using my fingertip pressed onto it. Distress Stickes in Pewter was dabbed around the edges of the number.
 
MEMORY MAZE PRODUCTS
Heel Click (motorbike)   SO516
2012   CO122
 
OTHER PRODUCTS
black cardstock, Tim Holtz Distress Stain & Stickles - brushed pewter, texture paste, black gesso, mesh tape, assorted metal and plastic embellishments.
...................................................
"BLESSINGS"
With Easter on its way I thought this would make a nice "candy sweet" card.
The rose ribbon corners from the 3D Stackums were fussy cut and layered under the stamped tag. Gems were stuck on the corners to finish the tag. The front edge of the card was punched with a Martha Stewart border punch. The edges of the tag and the embossed paper were smudged with pink ink.

The bottom layer is handmade patterned tissue paper. The top layer of cream embossed paper has been lightly brushed over with pink ink. The bows were cut out from the 3Dstackums and layered together with the chick on top.
The chick and all the eggs were painted with  pink, silver and gold glitter paint.
 
MEMORY MAZE PRODUCTS
Chick & Eggs   CODE
Eggs   CODE
Cream Embossed Rose paper   HMP007
handmade pink tissue paper
3D Stackums- CODE
 
OTHER PRODUCTS
ric rac ribbon, gems, stamp & ink, white bazzill bling cardstock
...........................................
I hope you have enjoyed seeing these layouts and card and have found some new ways to use your chipboard pieces.


Tuesday, September 4, 2012

Spring has Sprung

framed layered layout for a male

assorted fathers day/male cards
Since September is the month of "Fathers" we have some male orientated cards and layouts and not just the flowery ones we associate with Spring.....but we will have some more of those soon!

Thursday, May 3, 2012

May is for Mothers


May is a wonderful month to  treasure our mothers and carers, the people who nuture us and love us. Remember to tell them how much they mean to you. A handmade card is a real treat to any mum from a kid of any age! I have a box where I keep all my cards with special meaning to me and I scrapbook some as well. It's handy to have a few cards already made for the special occasions that happen throughout the year so have a card making day to get organised.
This month in our classes we are paying tribute to our mothers with cards and scrapbook layouts especially for them. Look out for these posts soon! Layouts of mums can be fun & bright & full of flowers & bling or older photos can be used to create a heritage, classical layout. Take cues from your photos to determine what sort of layout you want to create. Have a wonderful Mothers day.

Wednesday, October 5, 2011

Bookmark Tags

Here is the second lot of tags I made as boookmarks that can also be used in other projects.


I just gathered a pile of bits & pieces together & put the ones that went well together ino lots & played around from there. Lots of fun & pottering!

Thursday, September 29, 2011

Tag Bookmarks

Dual purpose tags...use as a bookmark (as a gift or for yourself) &/or use them on a card or layout. I used Glimmermist & a mask then stamped onto a plain sheet of card then cut out pieces to stick onto the tag. The tag was inked using distress inks in 2 colours. Ribbon, lace, stickers, flowers & metal pieces were used to embellish the tags. This project is good for using up left over bits & pieces. Take the time to cut out a stack of tags to have handy & that way you can complete one while you are scrapbooking, inking or stamping.
On the back of these tags I stamped a piece of card with "For You" & "To" & "From" to make the tag into a card itself. This makes a nice gift & one that you can send in the mail for any occasion.


Saturday, September 17, 2011

Springtime Scrappiness

I may have to rescan these cards as they look a bit surreal-maybe the settings were changed! The first card is a white base painted with a colour wash Then inked around the edges and stamped with a script stamp. The chipboard doilley has been inked then coated with chalkboard mist. The flower & the embossed scallop edge are made from Tim Holtz glassine paper( a bit like thick wax baking paper) with perfect pearls dusted over & heat set so it doesn't rub off.


 The background of this tag was inked & stamped with a mesh design stamp. The flowers & leaves were stamped & coloured in using Copic markers then cut out & layered.
 The detail in this card didn't scan very well. The embossing folder has a leafy design around the edges. The card was inked & colour washed. The bird cage is a Tim Holtz die cut that was coloured using alcohol inks as was the chipboard word.
 The embellishments on this card were pre cut from a cricut expressions machine &then stuck on top of patterned paper. Very quick & easy but effective looking.

Monday, October 25, 2010

Christmas is nearly here!


The top photo is of my craft area. We have our house for sale & I'm hoping for a bit more space to spread out in the new place! Since Christmas is so close the card classes at the Greenbank Scrapbook Shop are getting into the Christmas spirit early. Each week we are doing something Christmasy including scrapbooking & off the page for gifts or just spoiling yourself!

Wednesday, July 28, 2010

New cards


Here's the cards I've had the chance to make so far. I had to make up mini kits before we left home as I can't carry my whole craft room with me! Some of these will be used for card classes when I get home and back into the swing of things. It's good to have some on hand for when a card is needed then I don't have to rush to make one.