WELCOME

Thanks for taking the time to have a read of my Heart & Soul blog. You are welcome to leave a comment & any tips about scrapbooking or anything at all really!
LIVE WELL, LAUGH OFTEN, LOVE MUCH.
Happy Scrapping from Susan.

Sunday, October 16, 2011

Altered Book

This is an altered book I made for a CWA(Country Women's Association) cent sale. The plain mats are where the photos go.The acrylic word on the front says "Friends"
 In the book there are pockets & mini books for photos or keepsakes.

Wednesday, October 5, 2011

Bookmark Tags

Here is the second lot of tags I made as boookmarks that can also be used in other projects.


I just gathered a pile of bits & pieces together & put the ones that went well together ino lots & played around from there. Lots of fun & pottering!

Thursday, September 29, 2011

Tag Bookmarks

Dual purpose tags...use as a bookmark (as a gift or for yourself) &/or use them on a card or layout. I used Glimmermist & a mask then stamped onto a plain sheet of card then cut out pieces to stick onto the tag. The tag was inked using distress inks in 2 colours. Ribbon, lace, stickers, flowers & metal pieces were used to embellish the tags. This project is good for using up left over bits & pieces. Take the time to cut out a stack of tags to have handy & that way you can complete one while you are scrapbooking, inking or stamping.
On the back of these tags I stamped a piece of card with "For You" & "To" & "From" to make the tag into a card itself. This makes a nice gift & one that you can send in the mail for any occasion.


Saturday, September 17, 2011

Springtime Scrappiness

I may have to rescan these cards as they look a bit surreal-maybe the settings were changed! The first card is a white base painted with a colour wash Then inked around the edges and stamped with a script stamp. The chipboard doilley has been inked then coated with chalkboard mist. The flower & the embossed scallop edge are made from Tim Holtz glassine paper( a bit like thick wax baking paper) with perfect pearls dusted over & heat set so it doesn't rub off.


 The background of this tag was inked & stamped with a mesh design stamp. The flowers & leaves were stamped & coloured in using Copic markers then cut out & layered.
 The detail in this card didn't scan very well. The embossing folder has a leafy design around the edges. The card was inked & colour washed. The bird cage is a Tim Holtz die cut that was coloured using alcohol inks as was the chipboard word.
 The embellishments on this card were pre cut from a cricut expressions machine &then stuck on top of patterned paper. Very quick & easy but effective looking.

Monday, August 29, 2011

Blog candy

Stacy from scrapwithstacy.blogspot.com is having a birthday giveaway with some lovely blog candy. So take a look & have some fun!

Wednesday, August 17, 2011

Tutorials

There is a stand alone page on this blog titled tutorials but I also wanted to have some of the posts labelled as well so it is easier to go to where you want to see them together. I hope this will make things a bit easier and that you find them helpful.

Gift Card Box

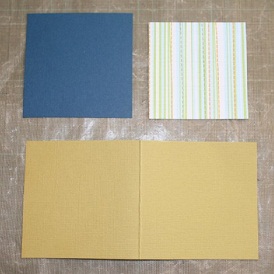
This gift card box makes a great gift for someone or you can just keep it for yourself and have a supply of gift cards on hand. They can be themed or blank general cards. I mix & match the colours & papers & embellishments so each design is different but still look good together. 2 sheets plain cardstock makes 8 cards at 20x10cm each. Another piece of plain cardstock is used for the matting & I use 2 sheets patterned paper for the top layer. Embellishments & stamping decorate each card.

 Start off by painting a small square box-this one is a 12cm square paper mache box. Two layers of paint give good coverage. You can ink or spray ink the box if perferred. The top of the box is decorated with paper & embellishments. A ribbon can be adhered around the rim of the lid &/or the box.
 The cards are made in a production line manner. Cut all the cards, then the mats then the top layer.
 Double sided tape works well & I tape all the pieces first.
 All the embellishments are assembled & any stamping is done. Then I tape the mat pieces on followed by embellishments. Sentiments can be stamped inside the cards if you wish.
 Any themes can be made or even a box of different occasion cards can be assembled.
These take a little time to make but they are lots of fun to do. You could also make up a mixed box by using up some of the scrap paper stash.